

 By
By Anyone researching the Creality Ender 3 V3 is usually trying to answer one of two questions: is this a reasonable printer to start with, or is it a reasonable upgrade from something more basic. That’s a fair thing to want clarity on, since the Ender 3 name covers a long lineup of machines by now, and the V3 specifically represents a fairly significant redesign compared to the older Bowden-style Ender 3 models a lot of people are already familiar with.
This article walks through what the Creality Ender 3 V3 actually is, what its build volume and hardware look like on paper, what it’s realistically good for, and where it falls short — based on published specifications and manufacturer and retailer information rather than a personal test run. If you’re comparing the Ender 3 V3 against other entry-level or mid-range FDM printers, this should give you a grounded starting point.
Creality Ender 3 V3 Overview
The Creality Ender 3 V3 is an FDM (fused deposition modeling) 3D printer built around a CoreXZ motion system, which is a meaningful departure from the simpler Cartesian layout used on earlier Ender 3 machines. In a CoreXZ setup, the X and Z axes are mechanically linked so two motors work together on movement, and Creality pairs this with linear rods on the Z-axis rather than a lead screw. This is designed to improve motion stability and reduce certain artifacts like Z-banding, though how much it actually shows up in a given print still depends on calibration, slicer settings, filament, and print speed rather than the motion system alone.
Build volume comes in at 220 x 220 x 250 mm — a fairly standard footprint for this class of FDM printer. The printer uses a direct drive extruder rather than the Bowden-style setup found on older Ender 3 variants, paired with a quick-swap “Unicorn” tri-metal nozzle designed to reduce clogging and make nozzle changes simpler.
Automatic bed leveling is included, along with input shaping (using an onboard sensor) intended to reduce ringing and vibration artifacts at higher speeds. The printer supports 1.75mm filament through a single nozzle, and according to manufacturer specifications, it’s capable of print speeds up to 600 mm/s with acceleration up to 20,000 mm/s² — though it’s worth noting these are marketed maximum figures, and Creality’s own published data cites a more typical practical print speed closer to 300 mm/s, which is still considerably faster than older-generation Ender 3 models.
The build plate is a removable, heated surface, and the printer runs on a 32-bit mainboard with WiFi connectivity, controlled through a 4.3-inch color touchscreen. Supported slicer file formats include STL, OBJ, and 3MF. Layer resolution is generally cited in the range of roughly 100 to 350 microns depending on settings and the specific print. The printer ships largely pre-assembled with some final assembly required, which is fairly standard across this category of machine.
Pricing for the Creality Ender 3 V3 varies by retailer, region, ongoing promotions, and whether it’s bundled with accessories, so it’s worth checking current listings directly through Creality or authorized retailers rather than relying on a fixed number.
Who Is the Creality Ender 3 V3 For?
The Creality Ender 3 V3 sits in an interesting spot: more capable than the most basic entry-level machines, but still positioned as an accessible, relatively affordable printer rather than a premium enclosed system.
Beginners who are comfortable with a bit of initial assembly and want a printer that doesn’t demand deep technical knowledge to get started are a reasonable fit, particularly given the automatic bed leveling and touchscreen interface. That said, complete newcomers who want the absolute simplest possible setup might find something like Creality’s more stripped-down SE-tier models, or a fully pre-assembled printer, slightly less involved to get running.
Hobbyists and makers who’ve outgrown a very basic printer, or who want faster print speeds and better dimensional accuracy than an older Bowden-style Ender 3 can offer, are a good match — the CoreXZ system and direct drive extruder represent a real step up from that older architecture.
Students and budget-conscious buyers looking for a capable machine without spending on a fully enclosed, higher-end system may find the Ender 3 V3’s price point and DIY-friendly design appealing, especially if they’re interested in eventually modifying or upgrading the printer themselves.
People moving up from an entry-level printer who specifically want faster, more precise prints without jumping straight to a significantly more expensive enclosed system are arguably the clearest audience for this particular model.
Who might want something different: anyone planning to print ABS or ASA regularly and consistently, especially at larger part sizes, may be better served by an enclosed printer, since the Ender 3 V3’s open-frame design makes those materials more prone to warping without additional modifications. Similarly, anyone wanting the absolute least amount of tinkering — someone who just wants to load filament and print reliably with minimal troubleshooting — might prefer a more turnkey, fully enclosed consumer printer, since open-frame DIY-style machines like this one still generally involve more setup and occasional maintenance than a sealed appliance-style printer.
What Can You Actually Print With the Creality Ender 3 V3?
Given its build volume and general FDM capabilities, the Ender 3 V3 is well suited to the kind of practical, moderate-sized objects that make up most of what people actually print day to day.
Desk accessories — phone stands, pen holders, small organizers — are a natural fit given the 220 x 220 x 250 mm build volume, which comfortably accommodates most desktop-scale objects. Cable organizers and clips print quickly and don’t demand much from the printer in terms of precision. Small storage items, like modular boxes or drawer organizers, work well within the build plate’s footprint, though larger storage systems may need to be split into multiple printed sections.
Replacement parts for household items — a broken clip, a missing knob — are a genuinely practical use case, assuming the part is reasonably sized and the design is dimensionally accurate. Hobby projects, including tabletop miniatures, terrain pieces, and game accessories, print well within this printer’s speed and detail capabilities, particularly with PLA. DIY and maker components, like custom electronics enclosures or simple jigs and fixtures, are a solid match for a machine like this, especially given its modification-friendly design.
Decorative objects — vases, small sculptures, seasonal items — print fine in standard filaments, and basic functional parts that don’t face extreme mechanical stress or high heat are reasonable projects as well. It’s worth being realistic, though: not every object is automatically suited to this or any FDM printer. Large single-piece prints that exceed the build volume, parts requiring extremely tight engineering tolerances, or objects meant for genuinely demanding structural or high-temperature applications may call for a different material process or a more specialized machine altogether.
Material Compatibility: What Filament Works Best
Filament choice for the Ender 3 V3 comes down to matching the material’s requirements — temperature, flexibility, strength, and how forgiving it is to print — against what the printer’s hardware and setup can realistically support.
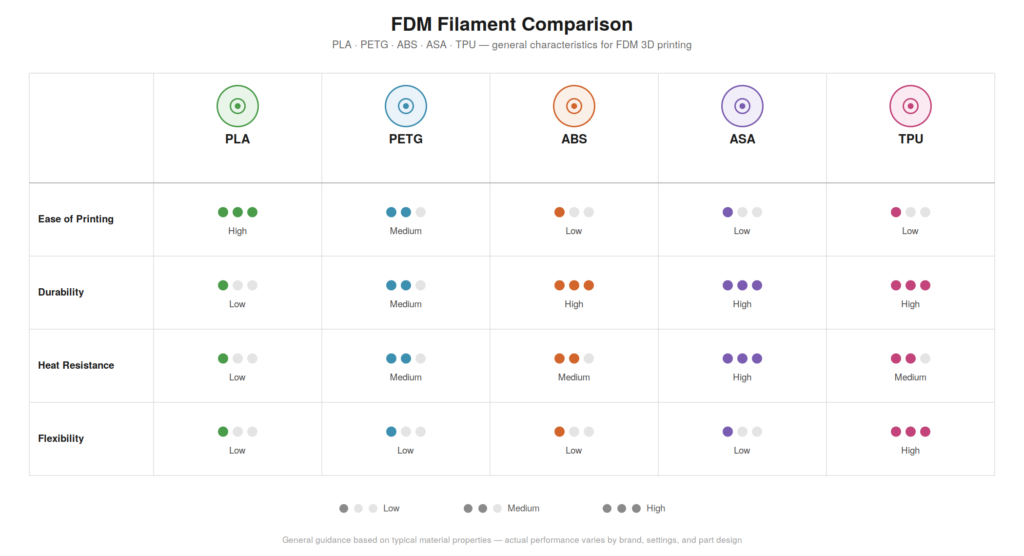
PLA is the most straightforward option and a sensible starting point for most users. It prints at relatively low temperatures, doesn’t require a heated enclosure, and is generally the most forgiving material for troubleshooting early prints. For decorative objects, prototypes, and most everyday desk or organizational prints, PLA is a reasonable default.
PETG steps up toughness and offers somewhat better temperature resistance than PLA, which makes it a reasonable choice for functional parts that get handled more often or sit somewhere warmer, like near a window or in a car. PETG needs a hotter nozzle and typically a heated bed, both of which the Ender 3 V3 supports, though it can be a bit more prone to stringing and generally benefits from slightly more careful retraction tuning than PLA.
ABS and ASA are both materials the Ender 3 V3’s hardware can technically reach the temperatures for, given its direct drive extruder and heated bed, but they come with a significant caveat: this is an open-frame printer without an enclosure, and both materials are genuinely prone to warping and corner cracking from uneven cooling as parts get larger. Small ABS or ASA parts may be manageable on an open-frame setup with careful settings, but larger prints are a real challenge without a more controlled, draft-free environment — typically an add-on enclosure or an enclosed space — and shouldn’t be assumed to work reliably straight out of the box.
TPU, a flexible filament, is more workable on the Ender 3 V3 than it would be on an older Bowden-style Ender 3, since the direct drive extruder shortens the path filament travels before reaching the hotend, giving better control over flexible material. That said, TPU still generally prints best at slower speeds than rigid filaments, and it benefits from a bit of extra patience while dialing in retraction and speed settings.
In short: PLA and PETG are the most straightforward, broadly reliable choices for this printer without additional modifications. ABS, ASA, and TPU are all achievable, but each comes with its own printing considerations that are worth understanding before committing a longer print to one of them.
Creality Ender 3 V3 Setup and First Print
Getting a new Ender 3 V3 from box to first successful print generally follows a fairly standard sequence for this category of printer, though exact steps and menu wording should be checked against Creality’s own included documentation rather than assumed.
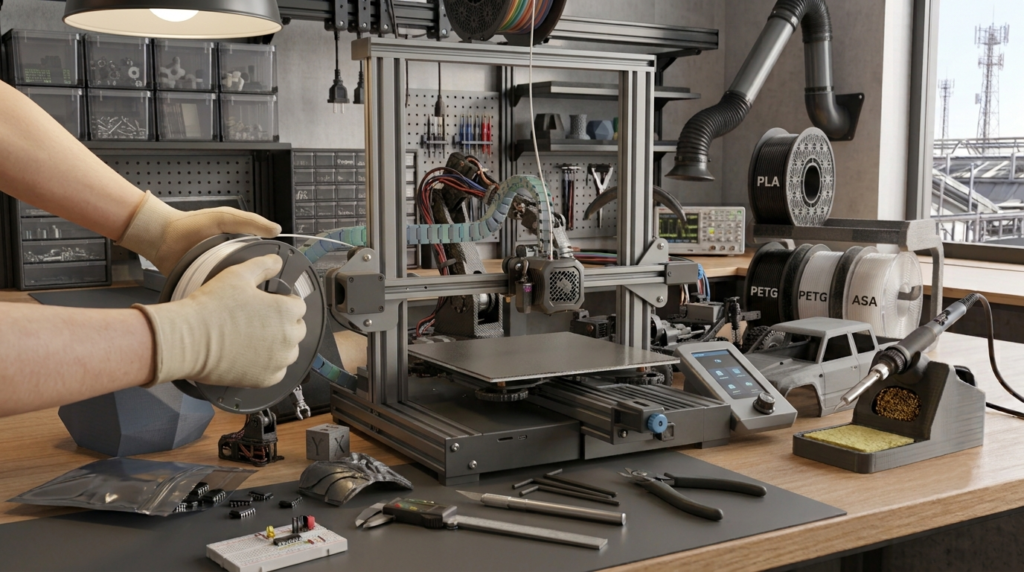
Start with assembly — the printer ships with some final assembly required, typically involving attaching the gantry, tightening frame components, and connecting cables according to the included instructions. Once assembled, check the build plate for any protective film, dust, or oils from handling, since a clean surface matters for first-layer adhesion.
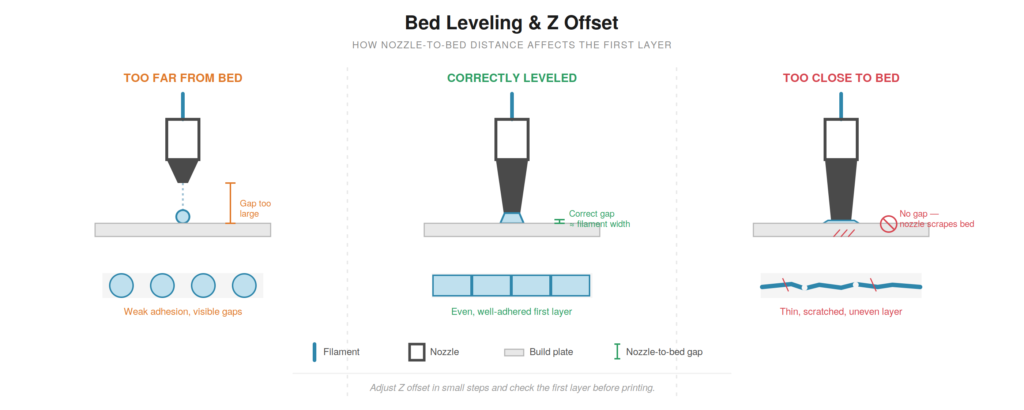
Load filament through the direct drive extruder, following the printer’s filament loading process, and make sure the nozzle and bed have reached an appropriate temperature for the material being used before starting. From there, run the printer’s automatic leveling and calibration features, which handle much of the manual leveling process that older Ender 3 models required by hand.
Before printing a full model, it’s worth selecting an appropriate slicer profile for the Ender 3 V3 (or a closely matching printer profile) in whichever slicer software is being used, since default generic settings won’t always reflect this printer’s specific hardware. Once a print starts, check the first layer closely — this is the most reliable early indicator of whether leveling, bed adhesion, and nozzle height are dialed in correctly. A clean, evenly adhered first layer is a good sign; visible gaps or dragging suggest something needs adjusting before continuing.
For an actual first print, starting with a simple, well-tested model — something small, without complex overhangs — is a sensible way to confirm the printer is behaving correctly before moving on to more ambitious projects.
Recommended 3D Printing Products
Affiliate Disclosure: Some links on this page are affiliate links. If you purchase through them, we may earn a commission at no additional cost to you.
| Product | Why Consider It | Best For | |
|---|---|---|---|
| Creality Ender 3 V3 | Main printer discussed in this guide | Beginners & hobbyists | Check Price |
| PLA Filament | Easy starting material | Beginners | Check Price |
| PETG Filament | More durable functional prints | Functional parts | Check Price |
| TPU Filament | Flexible prints | Flexible parts | Check Price |
| Replacement Nozzle | Useful spare for maintenance | Regular users | Check Price |
| PEI Build Plate | Replacement/backup build surface | Maintenance & upgrades | Check Price |
Creality Ender 3 V3 Pros and Cons
No printer in this price range is without trade-offs, and it’s worth looking at the Ender 3 V3 with a fairly even hand.
Ease of use is generally solid for this category — automatic bed leveling and a touchscreen interface remove some of the friction that made older Ender 3 models more intimidating for newcomers, though some initial assembly and basic troubleshooting knowledge is still expected.
Print quality can benefit from the CoreXZ motion system and linear rod Z-axis, which are designed specifically to improve motion stability and reduce the kind of Z-banding and ringing that affected earlier lead-screw-based designs, along with the added input shaping feature. That said, actual print quality on any given print still depends heavily on calibration, slicer settings, the filament used, and print speed — the motion system helps set a better ceiling, but it doesn’t guarantee good results on its own.
Speed is a genuine strength on paper, with marketed speeds well above older Ender 3 models, though as with most printers, real-world usable speeds for high-quality results tend to run below the maximum marketed figures, and Creality’s own data reflects that distinction.
Build volume, at 220 x 220 x 250 mm, is reasonable but not large — comparable to many similarly priced printers, but noticeably smaller than Creality’s own Plus-sized V3 variant for anyone planning larger projects.
Material flexibility is decent thanks to the direct drive extruder, which handles PETG and TPU more comfortably than older Bowden-style machines, though the lack of an enclosure limits how reliably it handles ABS or ASA at larger sizes.
Maintenance is a consideration with any open-frame DIY-style printer — belts, nozzles, and other components need periodic attention, and the DIY-friendly nature of the design means users comfortable with occasional troubleshooting will get more out of it than those wanting a fully hands-off appliance.
Noise levels for open-frame FDM printers running at higher speeds are generally noticeable, though specific decibel figures vary by unit and aren’t something that can be confirmed without direct testing.
Learning curve is moderate — more approachable than fully manual older printers, but still requiring more hands-on setup and occasional calibration than a fully enclosed, consumer-appliance-style 3D printer.
Upgradeability is a genuine strength, given the broader Ender 3 ecosystem of aftermarket parts and community modifications.
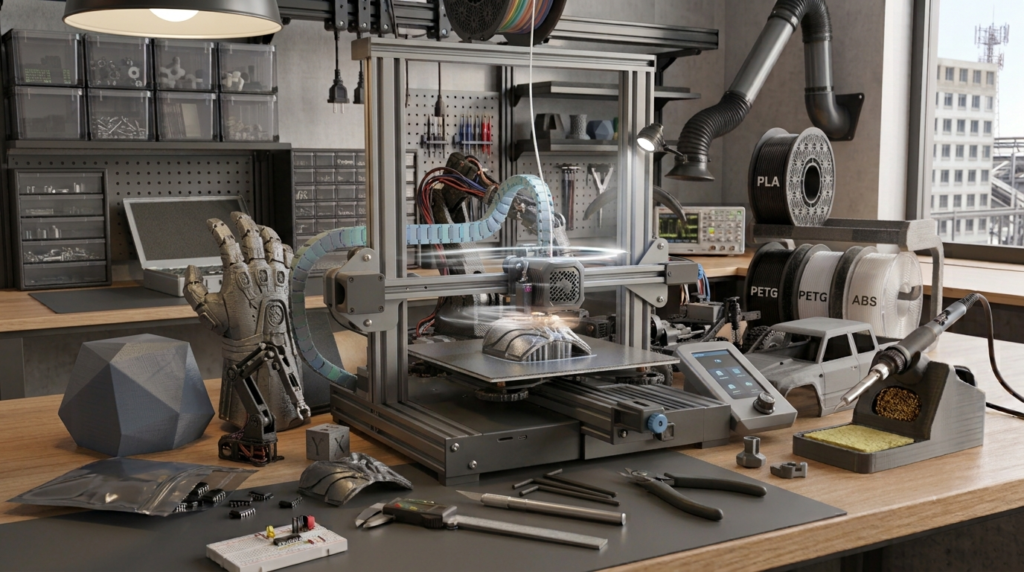
Creality Ender 3 V3 vs. Other Entry-Level Printers
For anyone weighing the Ender 3 V3 against other options in a similar category, here’s a general comparison. Treat all figures as approximate and subject to change — always confirm current specifications and pricing directly with the manufacturer or retailer before buying.
| Printer | Build Volume | Motion System | Extruder Type | Auto Leveling | Best For |
|---|---|---|---|---|---|
| Creality Ender 3 V3 | 220 x 220 x 250 mm | CoreXZ | Direct drive | Yes | Beginners to intermediate users wanting speed and precision at a moderate price |
| Creality Ender 3 V3 SE | 220 x 220 x 250 mm | Cartesian | Direct drive | Yes | Budget-focused beginners wanting a simpler, lower-cost entry point |
| Creality Ender 3 V3 KE | 220 x 220 x 240 mm | CoreXY | Direct drive | Yes | Users wanting fast, largely pre-configured printing with less manual tuning |
| Other entry-level open-frame FDM printers (varies by brand/model) | Varies | Varies (Cartesian or CoreXY/CoreXZ) | Varies (Bowden or direct drive) | Varies | Depends heavily on specific model — compare individual specs directly |
The Ender 3 V3 generally sits above the SE variant in terms of speed and motion system sophistication, while sitting below more automated, higher-speed models like the KE in terms of hands-off convenience. Where it lands best depends on how much a buyer values raw speed and precision versus simplicity or price.
What to Consider Before Buying
A few practical questions are worth sitting with before choosing the Creality Ender 3 V3 specifically. Does the 220 x 220 x 250 mm build volume comfortably fit the kinds of objects you actually intend to print, or would a larger-volume printer serve better? Are you comfortable with some initial assembly and occasional maintenance, given this is an open-frame, DIY-adjacent design rather than a sealed appliance? Do your planned projects lean toward PLA and PETG, which this printer handles comfortably, or do you need reliable ABS/ASA printing at larger sizes, which would benefit from an enclosure this printer doesn’t include out of the box?
It’s also worth comparing current pricing and included accessories before buying, since promotions and bundles can change the overall value.
You Might Also Like
- 3D Printing Innovations: What’s Actually Changing and Why It Matters
- How to Calibrate a 3D Printer: A Practical, No-Nonsense Guide
- Metal 3D Printer: A Practical Guide to How They Work, What They Cost, and Whether You Actually Need One
- Things to 3D Print: A Practical Guide to Useful, Fun, and Worthwhile Projects
- Drone with Thermal Camera — My Real 6-Month Experience (Mistakes Included)
- How to Become a Drone Pilot — What Actually Happened When I Tried It
- Agricultural Drone — What Actually Happened My First Season – 2026
Conclusion
The Creality Ender 3 V3 represents a genuine step forward from the classic Ender 3 lineup, particularly for anyone who’s used an older Bowden-style model and wants better speed, a more capable direct drive extruder, and a motion system designed to reduce Z-banding compared to older lead-screw designs. It’s not a fully enclosed, hands-off machine, and buyers who specifically need reliable ABS or ASA printing at larger sizes should factor that limitation in before purchasing.
For beginners willing to handle some initial assembly, hobbyists upgrading from a more basic printer, and makers who want an open, upgradeable machine at a moderate price point, the Ender 3 V3 is a reasonable option worth serious consideration. As with any 3D printer purchase, it’s worth comparing current specifications, pricing, and user feedback directly against your specific printing goals — build volume, material needs, and how much hands-on setup you’re comfortable with — rather than assuming any single printer is the right fit for every use case.