

 By
By So I bought a DIY drone kit on a kind of impulsive Tuesday afternoon. I’d been watching YouTube videos of people flying custom quads through forests and over fields, and something about it just got under my skin. I didn’t want to buy a DJI Mini and call it a day. I wanted to build something. I wanted to understand what was actually happening when that thing lifted off the ground
That was maybe six months ago. And I have a lot of feelings about it.
I should say upfront — I’m not an engineer. I’m not even particularly handy. I can assemble IKEA furniture without losing my mind, and I’ve done some basic electronics stuff in the past, mostly messing around with Arduino kits when I was going through a hobbyist phase a few years back. So I wasn’t coming into this totally blind, but I also wasn’t the target audience for “intermediate” builds.
The diy drone kit I ended up going with was the Eachine Tyro99. Not gonna lie, I picked it partly because a Reddit thread ranked it as one of the better beginner-to-intermediate options and partly because it was sitting in my price range and shipping from the AliExpress storefront was faster than I expected. I’d also looked at the Holybro Kopis and some Geprc stuff, but those felt like they assumed you already knew what you were doing. Which I did not.
At that point, I still wasn’t sure whether building a diy drone kit was a smart idea or just an expensive hobby phase.
The Build: Three Weekends and One Very Bad Solder Joint
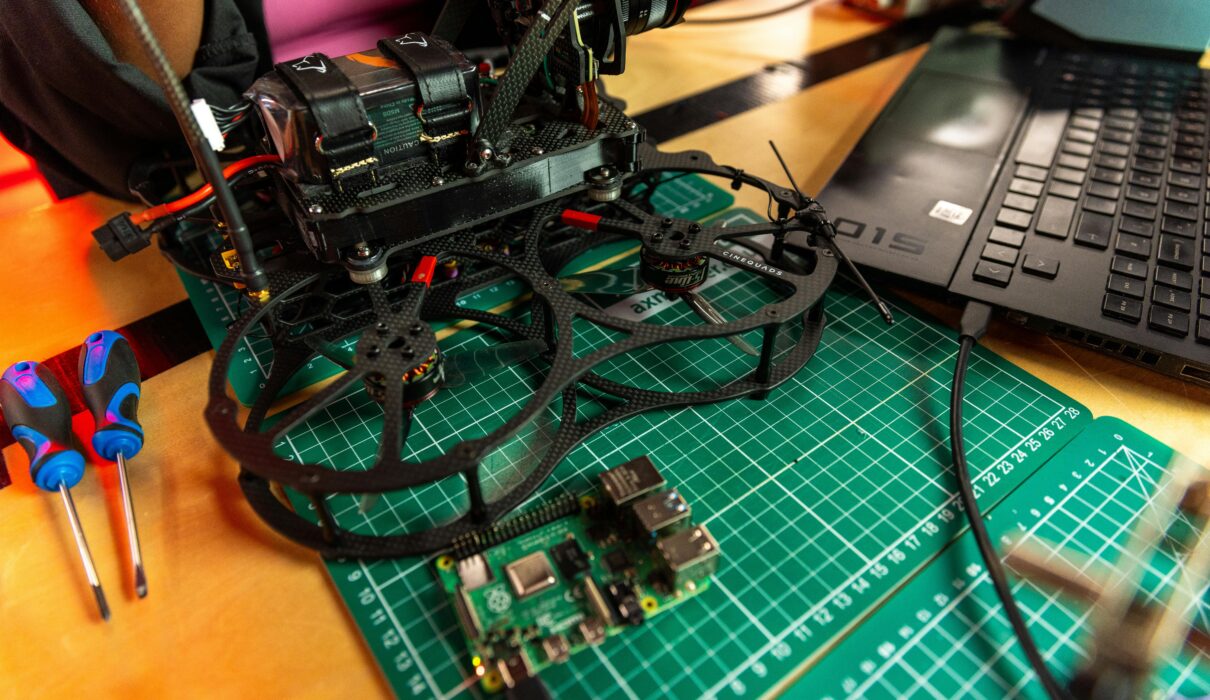
The kit arrived in a pretty unassuming box. Way more pieces than I was expecting. And I mean way more. There were bags of screws sorted by size, a small soldering iron included (which I later found out was not great and probably shouldn’t have trusted), the frame itself, motors, ESCs, a flight controller, props, and then a bunch of smaller components that I couldn’t immediately identify.
This part actually confused me. I kept cross-referencing the included instruction sheet — which was translated from Chinese and not always clear — with build guides on YouTube. Turns out the instruction sheet was mostly decorative. Not an exaggeration. The real education happened on a Joshua Bardwell video that I watched approximately four times. His Betaflight 4.3 setup guide specifically — around the 14-minute mark is where things finally started making sense.
I soldered the ESCs to the power distribution board in the wrong orientation early on. It wasn’t catastrophic, but it meant I had to desolder them and redo the whole thing, and if you’ve ever tried to remove solder from a through-hole connection with a cheap solder sucker, you know how that goes. Took me forever. I was annoyed in that specific way where you’re annoyed at yourself but you keep redirecting it at the object in front of you.
The soldering iron that came with the kit was genuinely terrible. That’s probably the one thing that annoyed me more than anything else in this whole process, and I know it’s a small thing, but still. It didn’t heat evenly, the tip was too blunt for fine work, and it made every joint look like I’d sneezed on it. I ended up buying a Hakko FX-888D midway through the build, and the difference was instant and humiliating. Should’ve done that before I started.
But okay. I was making progress. Slowly.
The frame itself was actually pretty satisfying to put together. The Tyro99 is a 210mm quad, and once I had the arms attached and the motors mounted, it genuinely started looking like a thing. A real flying thing. That moment — even before any electronics are in — is kind of exciting. I took a photo. Sent it to my girlfriend. She said it looked like someone had glued fans to a picture frame. She wasn’t entirely wrong.
Here’s the thing nobody really prepares you for when you go the diy drone kit route: the physical assembly is maybe 30% of the work. The other 70% is software configuration. And that was the part I dramatically underestimated.
Betaflight. If you’ve spent any time in the FPV hobby, you know what Betaflight is. If you haven’t, it’s the flight controller software that basically tells your drone how to behave in the air. It’s free and it’s incredibly powerful and it is absolutely not intuitive. I spent probably two full evenings just trying to get my flight controller to connect to the Betaflight configurator on my laptop. Turns out I needed a specific driver and there was a firmware version mismatch. Took me a while to figure out. A long while.
I’ll be real with you — there was a moment around day five where I genuinely thought about just buying a Freestyle DJI FPV and being done with it. Ready-to-fly. No drama. Just fly. I sat with that thought for like twenty minutes, staring at the pile of components on my desk.
But I kept going. Mostly out of stubbornness.
First Flight: 11 Seconds Before It Hit the Ground
Getting the thing in the air for the first time is a memory I’ll keep for a while. Not because it was graceful. It wasn’t. It was chaotic and terrifying and it only lasted about eleven seconds before I overcorrected and drove it straight into the ground.
But it flew. It actually flew.
Here’s something I didn’t expect: even crashing feels different when you built the thing yourself. Like, I was annoyed at the crash, sure, but I also immediately started thinking about what had happened mechanically. Was it my inputs? Probably. Was it the PID tuning? Maybe partly. You’re suddenly invested in a completely different way than if you’d just bought something off the shelf.
I broke two props in that first session. Expected that. Replacement props are cheap and I’d ordered extras.
What I didn’t expect was the motor mount on one arm cracking on impact. I’d overtightened one of the motor screws during assembly because I was paranoid about it coming loose mid-flight — the combination of that and crash force just sheared the plastic mount. Annoying. But fixable. I ordered a replacement arm, and in the meantime it forced me to actually look closely at the motor mount design, which I understood way better after having to repair it.
The flight characteristics after I’d done some basic PID tuning were honestly better than I expected for a budget build. It’s twitchy — that’s the nature of a 5-inch freestyle quad — but in a way that starts to feel responsive once you get used to it. I was flying on a simulator for the two weeks between finishing assembly and getting a weather window to fly outdoors, which helped a lot. Liftoff Sim, specifically. Not the most realistic, but close enough to get your thumbs calibrated.
Comparing it to something like the Emax Tinyhawk II, which I’d borrowed from a friend before committing to building — the custom build just has more headroom. More adjustability. If I want to swap a camera, or try different props, or experiment with motor timing, I can do that. With an RTF kit, you’re more constrained. Your experience might be different depending on what you’re trying to get out of it, honestly.
I’ve now done maybe thirty or forty flights on this build. Some were in a field near my apartment. A few were in my backyard on really calm mornings. I’ve had a motor cut out mid-flight (terrifying), one ESC that started running hot (annoying), and more prop replacements than I’ve kept count of. All of it has taught me something.
The motor cut issue, by the way, was entirely my fault. I hadn’t properly secured the motor wires after assembly, and the vibration gradually worked a connection loose. If I’d taken another ten minutes during assembly to use proper zip ties and a bit of heat shrink, that wouldn’t have happened. Live and learn.
$300 Later — Honest Verdict
Maybe I’m wrong but I think a lot of people come into the diy drone kit hobby expecting the payoff to be the finished product. Like you build it, you fly it, you feel good. And there is that. But the actual value — the thing that keeps me interested — is that I now understand drones in a way I never would’ve from buying something ready-made. When something goes wrong, I have at least a starting point for figuring out why. When I want to change something, I actually know how to change it.
For anyone curious about FPV without spending DJI money immediately, a diy drone kit honestly makes a lot of sense.
All in, I’m probably at $300 — I only know that because I added it up writing this. At the time I was actively avoiding doing that math. Around $180 on the Tyro99 kit, $80 on the Hakko, maybe $40 on extra props and replacement parts. Compare that to a DJI FPV at $999 or even the Avata 2 at $750+, and it feels reasonable. Especially given how much more I understand about what I’m actually flying.
Building your own also means repairs don’t feel precious. When I crash this thing, I fix it. When people crash an expensive RTF product, they sometimes just stop flying because the repair cost or the intimidation factor is too high. I’ve seen that happen. It’s kind of a hobby killer.
Here’s what I’d change if I did it again: better soldering iron from day one, a proper smoke stopper before powering up for the first time (I did not use one and got lucky), and more time on the simulator before my actual first flight. Those three things would’ve saved me time, money, and some stress.
But would I do it again? Yeah. No question.
A Few Things People Keep Asking Me
Is a diy drone kit actually beginner-friendly, or is that marketing? Honestly, it depends on the kit. The Tyro99 assumes you’re comfortable with basic soldering. If you’ve never soldered, build a cheap practice kit first — there are $10 LED blinker kits on Amazon that’ll get your hands used to an iron before you risk $180 in real components.
How long does a DIY drone kit build actually take? My first build was three weekends of focused effort, maybe 15–18 hours total including Betaflight setup. Someone with experience could probably do it in 6–8 hours. Your first time is always the slowest and that’s fine.
Do you need to buy stuff beyond the kit? Almost certainly yes. You’ll need a separate battery and charger, a radio transmitter and receiver, and FPV goggles if you want to fly first-person. A basic Radiomaster Boxer transmitter runs around $100. Budget for that separately before you start.
What breaks first? Props. Always props. Order extras before you even finish building. Frames crack too. The good news is you know how to fix it because you’re the one who put it together — that’s actually a huge advantage over RTF.
DIY Drone Kit Gear and Parts I Actually Used
Disclosure: This article may contain affiliate links. If you buy through these links, I may earn a small commission at no extra cost to you.
| Product | Why It Matters | CTA |
|---|---|---|
| DIY Drone Kit | Beginner FPV build kit | Check Price |
| YIHUA 926 | Much better soldering iron | View on Amazon |
| Radiomaster Boxer | Reliable transmitter | Buy Now |
| Caddx Ratel 2 | Better FPV camera quality | See Deal |
| Gemfan Props | Cheap replacement props | Check Availability |
Still Flying It
I’m still on the same build. Added a Caddx Ratel 2 recently — swapped from the included camera and the image quality difference was genuinely impressive. That’s the part I keep coming back to. It’s not done. It’s never really done. I’ll probably swap the flight controller at some point, try a different motor configuration, maybe build a second one with a smaller frame for indoor flying.
The Tyro99 is sitting on my desk right now with one bent prop from last Sunday. I’ll fix it this weekend. That’s kind of what this hobby is — there’s always something small to fix, and somehow that’s not annoying anymore.
If you’re thinking about buying your first DIY drone kit, just expect a learning curve, a few crashes, and a lot of late-night troubleshooting. That’s honestly part of the fun. Looking back, building a diy drone kit taught me more about drones in six months than years of watching YouTube videos ever could.
You Might Also Like
- Best Budget Drone — What Actually Happened When I Bought One in 2026
- Raspberry Pi Home Automation: What I Learned After 6 Months
- Best Home Automation Light Switches for Beginners (2026)
- Beginner’s Guide to Mini RC Drift Cars (Real Experience After 3 Years)
- Home Automation Switches for Beginners (Honest 2026 Guide)
- Savant Home Automation Review: My Shocking Real Experience After 2 Months